
DataWeave is the primary transformation language in Mule. What is interesting about DataWeave is that it brings together features of XSLT (mapping), SQL (joinBy, splitBy, orderBy, groupBy, distinctBy operators), Streaming, Functional Programming (use of functions in DataWeave code) to make it a power-packed data transformer. I am going to discuss some of the scenarios which will help developers solve some difficult problems using DataWeave. The three topics I would like to discuss here are:
- Calling Java methods in DataWeave
- Reusing DataWeave functions
- Change the value of field and keep the rest of the payload intact
Calling Java methods in DataWeave
Coming from a java development background and working on DataWeave which is completely declarative, I often come across problems which are so easy to solve in a programming language like java but difficult to visualise in DataWeave.
Today I want to discuss one of such problems, where I find it hard to solve it using DataWeave but to solve it using it in java is always quicker and time saving.
Problem Statement:
We have this payload that is being returned from Salesforce:
[
  {
    "ChildAccounts": [
      {
        "Id": "000183837",
        "type": "Account",
        "Name": "Secondary Account 1"
      },
      {
        "Id": "002683838",
        "type": "Account",
        "Name": "Secondary Account 2"
      }
    ],
    "Id": "27383839",
    "type": "Account",
    "Name": "Primary Account"
  }
]
It has to be converted to an output as below:
{
  "data": {
    "type": "Accounts",
      "attributes": {
      "items": [
        {
          "id": "27383839",
          "name": "Primary Account"
        },
        {
          "id": "000183837",
          "name": "Secondary Account 1"
        },
        {
          "id": "27383839",
          "name": "Secondary Account 2"
        }
      ]
    }
  }
}
Now the challenge here is the primary account should always be part of the items list along with the secondary accounts, with the map function of DataWeave we can iterate through a list but we cannot add the Primary account as the first element in the list. Which is why it is a bit trickier to solve it in DataWeave but very simple in Java as we can define an empty list and add the primary account first and then loop through the rest of the elements and add it. Below are the steps to achieve in Mule 3.x:
Step 1:
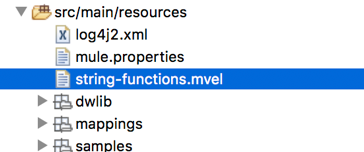
Create a mvel file in your project and define the method as below:
Step 2:
Add the mvel file as a Configuration in Mule as below:
<configuration doc:name="Configuration">
	<expression-language>
		<global-functions file="string-functions.mvel" />
	</expression-language>
</configuration>
Step 3:
Write the java function in the project as below:
public List < Item > mapAccounts(Object payload) {
 List < Item > items = new ArrayList < Item > ();
 if (payload == null) {
  return items;
 }
 if (payload instanceof HashMap << ? , ? > ) {
  HashMap < String, Object > account = (HashMap < String, Object > ) payload;
  if (account.isEmpty()) {
   return items;
  }
  Item item = new Item();
  item.setId(String.valueOf(account.get("Id")));
  item.setName(String.valueOf(account.get("Name")));
  items.add(item);
  ArrayList childAccounts = (ArrayList) account.get("ChildAccounts");
  if (childAccounts != null) {
   for (int i = 0; i < childAccounts.size(); i++) {
    Object current = childAccounts.get(i);
    if (current instanceof HashMap << ? , ? > ) {
     HashMap < String, String > map = (HashMap < String, String > ) current;
     Item it = new Item();
     it.setId(map.get("Id"));
     it.setName(map.get("Name"));
     items.add(it);
    }
   }
  }
 }
 return items;
}
Step 4:
Define the entry of the java class in spring-beans.xml
<bean id="accountsMapper" class="com.example.customer.mapping.MapAccounts" />Step 5:
Define the function in mvel file as below
def mapAccounts(payload) {
   app.registry.accountsMapper.mapAccounts(payload)
}
Step 6:
Final step is to call the java function in DataWeave file:
%dw 1.0
%output application/json skipNullOn = "everywhere"
---
{
	data: {
		type: "Account",
		id: payload[0].Id,
		attributes: {
			items: mapAccounts(payload[0])
		}
	}
}
Bingo… you are good to go. I know there were a lot of steps involved to just call one java method, but next time you keep on adding methods and add an entry to mvel file and you can call the java function in any of the DataWeave components.
Mule 4 has actually made it even simpler as MEL has been removed we can skip step 1, 2, 3 and 4 and simply import the java class and call its functions. A lot of examples can be found from link here
Note:
The disadvantage of using the above technique is, it reduces the readability of the code because, all the transformation is done in Java. But the good thing is that the java code still can be debugged for any defects. And based on individual preference java or even groovy can be used.
Reusing DataWeave Functions
In the DataWeave 1.x version included in the Mule runtime v3.8, there has been limited support for reusing DataWeave functions and variables between Transform Message components (the component that applies DataWeave code). In particular, there is currently no direct support for importing modules or libraries of DataWeave code. But starting with Mule Runtime v3.8.4 there is a new readUrl function you can now use to start reusing DataWeave code across applications and even across deployments.
Step 1:
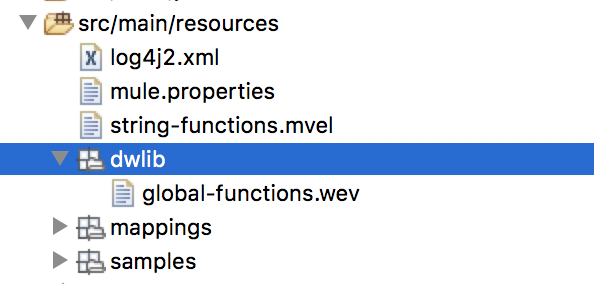
Under the src/main/resources of the mule project create a folder of any name. I have named it as dwlib for the example and create a file called global-functions.wev
Step 2:
Create your reusable functions and variables inside the library as below:
%dw 1.0

%function addition ( num1, num2 )
"$(getIntroString()) :  $(num1 + num2)"
%function getIntroString()
"The total amount is: "
---
//Provide external names for variables and functions defined in the header
{
  addNumbers : addition
}
The above file defines two functions. One is an addition of numbers and other is a function which prints an introduction string. The body expression creates key names for the variables and functions. So “addNumbers” is the public alias of the internal “addition” function. DataWeave refers to the function by its public alias.
Step 3:
Calling the reusable function inside a DataWeave script:
%dw 1.0
%output application/json

%var myLib = readUrl("classpath://dwlib/global-functions.wev", "application/dw")
---
{
    result: myLib.addNumbers(5,9)
}
In this example, we embed the DataWeave library file inside the project, so we give the URL relative to the classpath dwlib/global-functions.wev . If you are deploying into a customer-hosted on-prem Mule runtime, you could also store your DataWeave libraries in a common external location that you add to the Mule runtime’s classpath.
Change the Value of Field and keep the rest of the Payload Intact
There are many instances when we get the data from a Process API (Domain API) and before we forward the data to the Experience layer (Adapter) we want to change one element of the payload but keep the rest intact. For example we may want to hide some vital information or change the Country name from AUS.
Let’s walk through one of such example: The payload I have is as below:
<users>
    <user>
       	<personal_information>
          	<first_name>Emiliano</first_name>
          	<middle_name>Romoaldo</middle_name>
          	<last_name>Lesende</last_name>
          	<ssn>001-08-84382</ssn>
       	</personal_information>
        <login_information>
    	    <username>3miliano</username>
          	<password>mypassword1234</password>
       	</login_information>
    </user>
   	<user>
       	<personal_information>
           	<first_name>Mariano</first_name>
           	<middle_name>Toribio</middle_name>
           	<last_name>de Achaval</last_name>
            <ssn>002-05-34738</ssn>
        </personal_information>
       	<login_information>
           	<username>machaval</username>
           	<password>mypassword4321</password>
       	</login_information>
    </user>
</users>
Here the problem statement is to mask the password and ssn information from the end user. But to keep the rest of the payload as is as below:
<?xml version='1.0' encoding='UTF-8'?>
<users>
    <personal_information>
        <first_name>Emiliano</first_name>
        <middle_name>Romoaldo</middle_name>
        <last_name>Lesende</last_name>
        <ssn>****</ssn>
    </personal_information>
    <login_information>
        <username>3miliano</username>
        <password>@@@@@@</password>
    </login_information>
    <personal_information>
      	<first_name>Mariano</first_name>
        <middle_name>Toribio</middle_name>
        <last_name>de Achaval</last_name>
        <ssn>****</ssn>
    </personal_information>
    <login_information>
        <username>machaval</username>
        <password>@@@@@@</password>
    </login_information>
</users>
We can easily achieve this in Dataweave 3.x by using mapObject function in Dataweave by writing the following code:
%dw 1.0
%output application/xml
---
users: {
 (payload.users mapObject (userObject) -> {
   user: {
  	personal_information : userObject.personal_information mapObject {
	 	($$) : "****" when $$ ~= "ssn" otherwise $
	 },
    login_information : userObject.login_information mapObject {
		($$) : "@@@@@@" when $$ ~= "password" otherwise $
	}
   }
 })
}
The mapObject(userObject) function in DataWeave is used to map each of the users in the input. When on each user, it uses two other mapObject functions to process the fields in both personal information and login information. In each case the function replaces the value of the ssn to ** and password to @@@@.
In Mule 4 the introduction of “if” and “else” has made it even easier to achieve. The above code can be written as below:
%dw 2.0
output application/xml
---
users: { (payload.users mapObject (userObject) -> {
 user: {
  personal_information:
  	userObject.personal_information mapObject (value, key) ->
   	{
      	(if (key ~= "ssn") (key): "****"  else (key): value)
   	},
  login_information:
  	userObject.login_information mapObject (value, key) ->
   	{
      	(if (key ~= "password") (key): "****" else (key): value)
   	}
   }
 })
}
Conclusion
So here we learned three different ways to solve complex problems in DataWeave. There are many more features available in Dataweave which allows difficult problems to be solved with minimal code. Watch out for more examples in future articles.